“What’s Kraken?” An Exercise in Painting Guild Ball - Part 2
Onto some more metallics - have I mentioned how much I like Vallejo air metallics?
This time, bright bronze

Another couple of base coats and we have something to work with…

So I’m gonna highlight this with copper… then we get onto the fun stuff.
You know how brass etc don’t really “rust” but get a dull, kinda funky green oxidisation thing happening… I kinda feel like these guys will be spending a bunch of time near the water and metals could get funky… queue the oxidisation… Or “Petina”
The plan for this Foul Green. To be honest, Vallejo model colour has a petina effect… but it’s a bit too light for me, I kinda dig the slightly more over the top colour of the darker green.

This brings us to another essential part of any painter’s arsenal… or any painter that uses dropper bottles at least…

Yup. Paperclip… Occasionally a tiny bit of paint dries in the dropper bit… Now you CAN just keep squeezing until the pressure just pushes that blockage out. But if history has taught me anything, it’s that you will also lose a significant amount of paint, that will proceed to go everywhere.
Trust me, use the paperclip...
So, we REALLY wanna water this sucker down… Like a WHOLE lot.

Water it down till ye cannae water no more!
Then apply like a wash. Most washes are naturally transparent, paint not so much… So using a paint instead of a wash means we get a really nice matte effect, it does have a more prominent effect over metallics, and tones down the shine a bunch more than a wash would…

Some funky cold petina
Whilst that is drying, because I’m impatient, let’s do some more to the silver. Again, keeping with the traditional scheme & wanting to tie the silver in a bunch, I’m gonna hit it with some blue wash, Enter Sapphire…


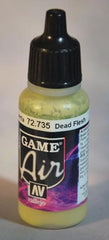
All that netting, I’m trying to tread the line between interesting and not over the top. So going with a funky mustardy yellowy vomity browny colour: Scrofulous Brown. I’m gonna highlight this with some dead flesh, then just a little bone white. Whilst doing the bone, we’ll also hit all the stitching and detail around the place… Then I’m gonna hit it with some of that dark sepia wash again.


And once we have some paint on that webbing and rope and stuff…

Starting to get there!!
Just gonna also hit the webbing with some of that amethyst wash, the algae, and the fur on his boots with a black wash.

All those washes, he’s never been so clean!
Right. There’s some stuff to come back and finish up and the like. But for now, let’s have some fun.
Planning on giving this guy some ink. Tattoos… Plan is some kinda squid dealio on his back.
Basically I googled “squid tattoo” and “tribal squid” and stuff until I thought I had an ok idea of a general shape.
Now the straps across his back really divide up the big ol’ piece of flesh I wanted to use… I thought about just doing it below the strap… But I didn’t really think he deserved a tramp stamp… So we’ll try and work around it.
Colour wise, sticking with the “kinda sorta medieval fantasy setting” tattoo ink wouldn’t be the quality it is today. Go find someone with old tattoos, they kinda go this funky blue and bleed out a bit and stuff…
So to give us that effect of old ink, I’m mixing black with a dark blue, Imperial blue, and just a smidge of the fleshtone… Again, nice and thin, we kinda just wanna start blocking out shapes, then slowly layer it & darken it up and stuff…


Quite a few layers later, we end up here.
Now, whilst I like the slightly “bleeding ink” look, I want to tighten it up a little bit.
Queue a bit of a secret…

Yeah, screw a brush for this. I want a hard line, and I want it easily.
These suckers come in all kinds of colours… We’ll need to do some work to make it look “under the skin” instead of just “drawn on” (which to be honest, it is).

Just a little sharper.
So tattoos are actually under the skin… and the older they are, the more they fade. What I’m doing now is going back and highlighting / glazing with the same blue, mixed with a decent amount of fleshtone. Because it’s sooo diluted, you can be pretty liberal, just make sure not to get too much in any major recesses and you’re good.

So it’s a little less “drawn on”.
Ok - I’m gonna go back and shade the skin around it… but it’s a bit wet.
I SHOULD go away, let it dry, and come back to do the next step… But I’m impatient… what can I do in the meantime? Let’s give him some stubble!
Note: I’ve ruined SOO many models by not waiting for layers to dry completely. Ushing is always a bad idea. Don’t do it. Just don’t.
Anyhoo - fuck waiting, what would I know anyway?
Stubble. Stupidly easy:
Take black.
Water the hell out of it.
Water it down some more.
Apply.
Again, it’s super thin. So too much on your brush and that shit will go everywhere… THIN coats.
From there, I mix in a little of the skintone and give it a bit of a highlight… Just enough to make it look less like you’ve painted black on skin.
Heads, Faces, Hell - you could do this to bikini zones… the recipe stays the same.


So as well as the stubble, you can see here that I’ve gone and shaded the body a bit more. Keep everything SUPER thin at least 50:50 wash : water… Here I’ve used sepia again, then a little bit of red.
Onto the base.
Step 1. Clean it up a bit.
Solution: Adeptus Battlegrey. Or whatever the foundation dark grey is these days - I’m pretty sure they don’t make this particular one anymore… Of course I could also just be making that up.
On a side note. This, a little bit of black, then SMOTHER it in a heavy black wash and you have instant black. Like a black suit or something… that’s a sweet, easy way to do it. Paint it black straight off and it won’t look black (how do you shade it? You can’t get blacker than black) Nice dark grey, and wash the hell out of it.
But I digress (again)...

This one… do they still make it?
From here, I’m gonna wash the base… Again, shading with colour = interesting. Purple, green, bit of red… just shade different sections different colours. It works.

And now I want to tie it all in together.
Stonewall grey is my rocky go to.
That and a (dare I say it)... Drybrush (heresy! Shun the nonbeliever!!)


Ok - drybrushing… it’s really not seen heaps by “top level” painters… but it’s good for one thing. Namely stuff with LOTS of texture… like rocks… I don’t have to be super careful here… it’s the base for fuck sake.
The army painter brushes. They’re pants. Absolute rubbish. I have a couple and wouldn’t use them for anything other than bases / drybrushing / terrain… really average. But for this, they work.
Also, the other thing with drybrushing (I’m assuming we all know what it is): You want less paint on your brush than you thought (we seeing a pattern forming here?) the only way I can get it right is to use my hand to wipe my brush onto. It means I end up with a hand covered in paint, but the right amount of paint on the brush…
To be honest, I was a little heavy handed here… but y’know.

The water, step 1 is a big ol’ base coat with falcon turquoise.

Then highlight up to white in a couple of layers (so like a 50:50 turquoise:white, like a 30:70… then a pure white highlight.
I’m pretty rough with these, kinda make sure the paint is diluted enough, and kinda dab at it until I’m happy… I’m kinda ok with having a harsher blend here… it’s water. Water is irregular…
Also by now, I’m about ready to be done… WILL THIS MODEL EVER BE COMPLETELY PAINTED??!

Dab dab dab… yeah, it’s rough… but it’s ok, we can fix it later… I have a cunning plan…
Base rim. Like the rolling stones said: Paint it black.
Yeah, you could paint it other colours. I like black. I don’t want it to stand out, I don’t want people to focus on it. So black.

I see a red door… or some such rubbish. Man the stones were overrated…
Varnish. Now is the time.
Are we finally bloody well done I hear you ask? Nope. Sorry kids, but we are gonna varnish it now.
The secret weapon washes dry a bit shiny, and the micron pen does as well… also it tends to smudge. Let’s just seal everything.
Testors Dullcote. It’s good. The cans are tiny. I’ve also been known to use generic clear matte varnish from Bunnings. Like a wattyl estapol varnish. It goes ok. But let’s pretend we are picky about what we use:

Tiny tiny can of varnish.
Right. We have an ALMOST finished Kraken.
So very close. You can smell it.
Frankly, you COULD stop here… I just wanna get a little fancy.
Water effects. Basically I’m planning on filling the base with it. It’ll give the water a little depth & a shine. Both things I want.
I’m using secret weapon water effects.. . The back to base-ix one is good… woodland scenics… whatever. It’s all the same stuff.
Basically make sure there isn’t any holes in the base and pour it in. I like to put the model on some baking paper in case of spills. Means you can peel it off & nothing ends up stuck to the table etc...

So we could stop here… but he’s on a rock, it kinda looks like the sea. The sea isn’t flat… let’s make some waves.
Ok, I want a bit of a “splash” effect, like water is hitting the rock & splashing up and stuff.
I’m gonna dig out some clear plastic, like the plastic from a blister pack that I got kraken in. I REALLY like the curved bits…
Using regular everyday scissors (that I stole from the kitchen) I’m gonna cut out a couple of “splash” shapes.
That curved section of the pack is good, because you get a little bit of a water hitting the rock and splashing backwards kinda movement. That’s the dream anyway…

It’s hard to photograph clear stuff
Ok, from here I’m gonna dip the flat side in clear PVA craft glue and position it on the base.
Use tweezers or needlenose pliers or something. It makes life easier.

The glue dries clear. But here you get an idea of the “curve” I’m trying to use.
Ok, lastly… I want to incorporate the plastic sections and the water a bit & create some more movement.
This shit is like my favourite thing in the world.
Vallejo heavy gel.
It’s like a super thick gel that dries hard and clear (that’s what she said). It’s soooo goood for creating movement & texture in water.
Basically take a brush you really don’t like, one of those army painter ones would be good for this (you’re about to ruin it).
Smear some of the paste on where you want it, and tease it around to create some texture.
It’s a bit messy, but fun. I’ve also found it shrinks a bit when dry, so may need a couple of layers to get the desired effect.

Here it is wet… You can go a bit silly.
So this actually took a couple of coats to get the desired effect.. Just let it dry, go over it.. Rinse and repeat until you’re happy.
And done!

Finally, right?!
And here he is with a few friends…

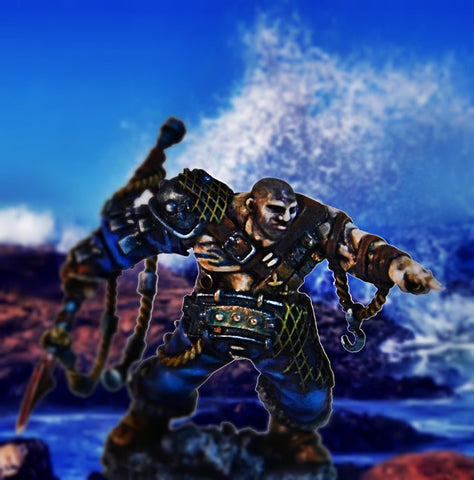
And because photoshop is fun…

Anyhoo - you get the idea…
That’s it, that’s how we got from undercoat to finished.
There’s PLENTY of other ways to do things, there’s probably better ways to do things, but this gets a result that I’m happy with, doesn’t take toooo long (although it takes HEAPS longer when you stop to take pics at every step).
Realistically it can all be summed up in a few steps:
- Thin your paints. Really.
- Have less on your brush.
- Use colours.
- Layers
- Tricks are fun and people are easily impressed
That’s about it…
Hope this was in some vague way useful to somebody out there.
Happy painting!
Mouse.
